

Beginner-Friendly Macrame Projects for Bohemian Home Decor
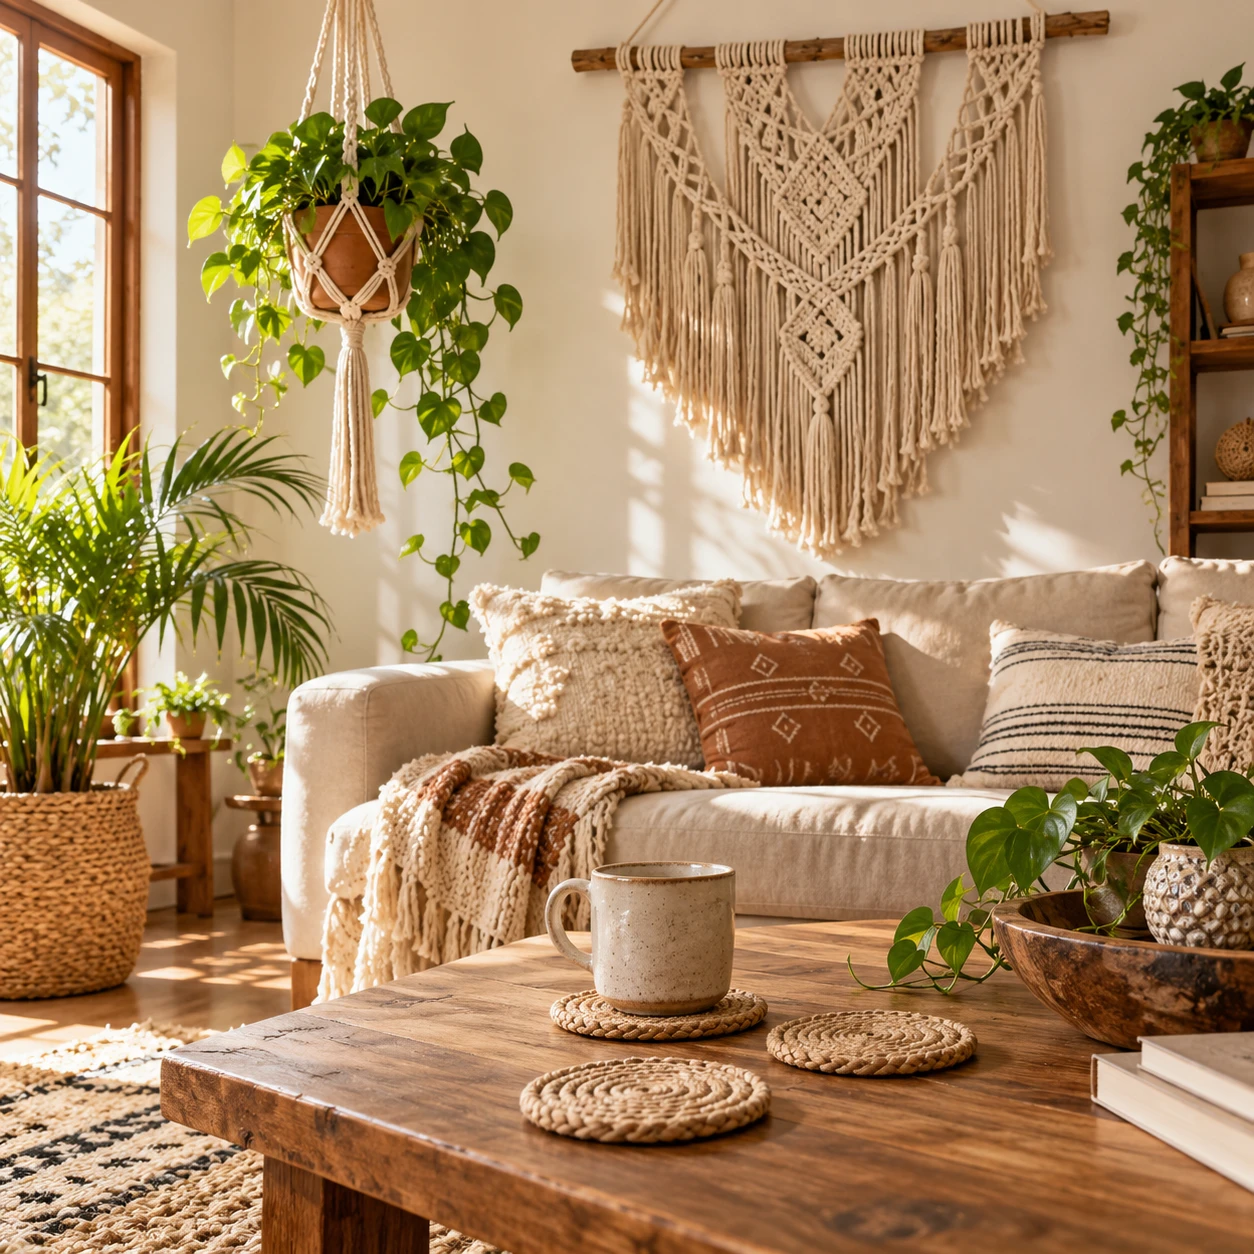
Macrame brings handmade texture to a room using little more than cord and a few simple knots. If you are new to the craft, small projects such as a wall hanging, plant hanger, coaster, or curtain tie-back let you practice at a manageable scale while adding a relaxed, bohemian touch to your home.
You do not need a large collection of tools or an intricate pattern to get started. Choose a project that fits your space, learn the lark’s head and square knots, and work steadily. Your first piece may have a few uneven edges; that is part of learning how cord behaves.
Getting started: materials and basic knots
To start macrame, gather macrame cord, scissors, a tape measure, and a support such as a wooden dowel or sturdy ring. Learn the lark’s head knot for attaching cords and the square knot for building simple patterns.
For most beginner home decor, **3 mm to 5 mm cotton cord** is easy to handle: it is visible while you work and usually soft enough to comb into fringe. Single-twist cord unravels readily for a feathery finish, while braided cord holds its shape and is less likely to fray. That stability can make braided cord easier for a first project, though it will not produce the same soft fringe.
- Macrame cord: Select a thickness suited to the project. Thinner cord works for coasters; medium cord is a practical starting point for wall decor and plant hangers.
- Scissors and tape measure: Sharp scissors make cleaner cuts, and measuring helps keep repeated cords consistent.
- Support: A wooden dowel, curtain rod, or ring can hold your work in place. A clipboard or a firm cushion can also steady a small project.
A lark’s head knot attaches a folded cord to a dowel: fold the cord in half, place the loop over the support, then pass the loose ends through the loop and pull snug. A square knot uses four strands. Cross the left working cord over the two center cords and under the right cord; pass the right cord behind the center cords and through the left-side loop, then tighten. Reverse the direction for the second half. Practice a few repetitions before beginning a project so your knots sit evenly.
Simple macrame wall hanging
A simple macrame wall hanging adds texture to a blank wall with a wooden dowel and repeated knots. It is a good first project because you can keep the design small and use only lark’s head and square knots.
Cut an even number of cords, each about four times the finished hanging length as a starting estimate. Fold each cord in half and attach it to the dowel with a lark’s head knot. Work in pairs or groups of four to make rows of square knots, leaving spaces between rows if you want a lighter, more open pattern.
Once the panel is long enough, trim the lower ends into a straight line, shallow V, or angled shape. Comb the fringe only if your cord type allows it; braided cord, for example, may not separate neatly. Hang the piece where it can be seen without brushing against furniture or a doorway. A small wall hanging can soften a reading nook or entryway, while a larger design will need more cord and more time to keep its edges balanced.
For a tidy result, check the knot tension every few rows. Pulling one knot much tighter than its neighbors can make the panel slant. If that happens, loosen the row gently and retighten before continuing.
Easy plant hanger
A beginner macrame plant hanger uses several cords, a ring or loop, and basic square knots to hold a lightweight pot. Choose a stable pot and test the hanger close to the floor before placing it in a high or hard-to-reach spot.
Start by cutting four or six cords to the length your design needs, allowing extra for knots and the gathered base. Tie them to a ring with lark’s head knots, or fold and knot them together if you are not using a ring. Divide the strands into groups and make short sections of square knots to form the hanger’s arms.
Leave an open section for the pot, then use alternating cords from neighboring groups to connect the arms beneath it. Tie all strands together in a firm gathering knot to create the base. Set the pot inside and check that it sits level before hanging the piece. Cord length and spacing depend on pot size, so make a quick mock-up with the empty pot rather than relying on a pattern measurement alone.
Keep the first version simple and avoid heavy ceramic pots until you have checked the knots and cord. Macrame cord can stretch or shift under weight, and handmade knots are only as dependable as their construction. A lightweight nursery pot is an easier starting point.
Macrame coasters and table accents
Macrame coasters are compact projects that bring handmade detail to a dining or coffee table. They use less cord than a wall hanging, so they are a practical way to practice even tension and repeat a small pattern.
Use cotton cord that is easy to shape, and begin with a simple spiral or square-knot design. Tie a short length of cord as a center, then work around it with repeated knots, keeping the piece flat as it grows. Alternatively, make a small square panel and trim the edges into fringe. A first coaster may take a little adjustment to lie flat; loosen overly tight knots and check that each new row sits at the same distance from the last.
Plan for the finished coaster to be large enough for the base of your cup or glass, and make a test piece before cutting cord for a full set. Cotton is absorbent, but knotted fiber is not automatically heatproof or stain-resistant. Use coasters for cool or warm drinks rather than hot cookware, and follow the care guidance for your cord if you need to wash one.
Vary the cord color, fringe length, or knot spacing to suit your table. For a coordinated set, keep the same basic dimensions while adding one small variation, such as a contrasting center strand.
Quick curtain tie-backs
Macrame curtain tie-backs add a bohemian accent to a window and can be made with a short length of cord and a few knots. They are an approachable choice when you want to try macrame without building a full wall panel.
Measure around the curtain where you want the tie-back to sit, then add enough cord for knotting and a comfortable fastening loop. Make a short square-knot section, or keep the cord mostly plain and add knots near the ends. Finish each end with a secure knot or a loop that fits around a small wall hook.
Test the tie-back on the curtain before trimming the ends. It should hold the fabric gently without pulling it out of shape or putting strain on the fabric. For heavier curtains, use a properly installed hook and strong cord; a decorative tie-back alone is not a substitute for secure hardware. A narrow design in cream or natural cotton can complement the woven textures often found in bohemian home decor.
Finishing touches and personalization
Finish macrame decor by checking knot tension, trimming only after measuring, and matching the final size and color to the room. Small changes to cord, fringe, and spacing can make a basic beginner pattern feel personal.
Before you cut, lay the piece flat and compare both sides. Use a tape measure to mark a straight edge or create a paper template for a V-shaped finish. Trim a little at a time; removing extra cord is easy, but restoring it is not. If you are making multiple pieces, compare them side by side so their lengths and proportions feel intentional.
- Adjust the scale: Shorten a wall hanging for a narrow space or lengthen a plant hanger to suit the distance from ceiling to pot.
- Change the color: Natural cotton works with many palettes, while a single muted-color strand can add a quiet accent.
- Personalize the finish: Try fringe, a clean edge, wooden beads, or a different dowel. Check that embellishments are secure, especially near children or pets.
- Style with care: Pair one handmade piece with existing wood, plants, and textiles rather than crowding a small area with too many new textures.
Common beginner setbacks are usually easy to correct. Uneven knots often come from inconsistent tension, so pause every few rows and compare the spacing. A piece that turns out too short may have used more cord in the knots than expected; make a sample section first and measure how much cord it consumes. For a small project, that test can prevent wasted material and a disappointing finish.
Beginner macrame FAQs
Beginners can get started with soft, manageable cotton cord, a lark’s head knot, and a square knot. These answers cover cord choice, knot basics, cord estimates, and alternatives to a wooden dowel.
What cord is easiest for macrame beginners?
Medium cotton cord, around 3 mm to 5 mm, is a helpful starting point for many wall hangings and plant hangers. Choose braided cord if you want knots that hold their shape and are less prone to unraveling, or single-twist cord if you want combed fringe. For coasters, thinner cord may be easier to shape neatly.
Which macrame knots should beginners learn first?
Start with the lark’s head knot to attach cords to a support, then practice the square knot. Once those feel consistent, try alternating square knots to connect rows. A small sample is enough to learn the hand movements before you begin a larger piece.
How much cord should I prepare?
There is no single cord ratio that works for every pattern because cord thickness, knot density, and design all change the amount used. For a simple wall hanging, a rough estimate is four times the finished length for each working cord, with extra for fringe. Make a short sample and measure your actual cord use before cutting a full set.
Can macrame be made without a wooden dowel?
Yes. Use a sturdy curtain rod, a metal or wooden ring, a branch, or another firm support that suits the project. For small work, a clipboard or cushion can hold the cords while you knot. Check that the support can carry the finished piece safely before hanging it.
These beginner-friendly macrame projects give you several ways to add handmade texture to a room, from a simple wall hanging to practical coasters. Start with one small design, keep your first pattern uncomplicated, and make a sample when cord use or sizing is uncertain. The practice you gain will make the next piece neater and easier to personalize.