


How to Build a Custom Headboard with Basic Woodworking Skills
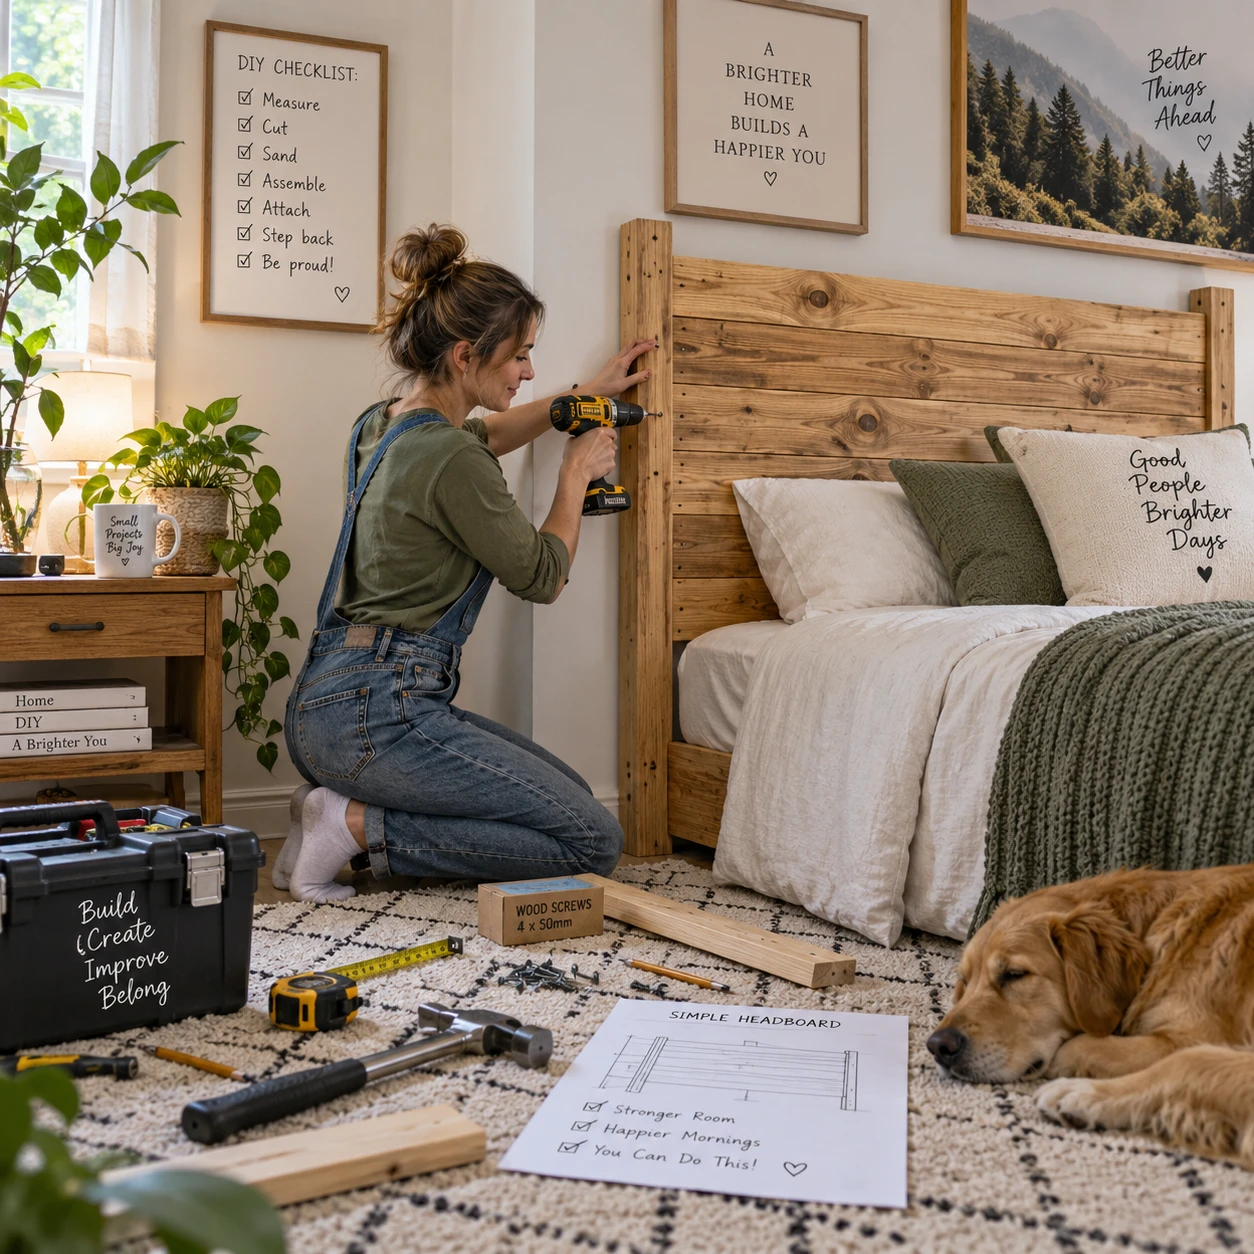
A custom wooden headboard can change the look of a bedroom without requiring advanced joinery or a fully equipped workshop. With careful measurements, straight lumber or a plywood panel, and a few common tools, you can build a sturdy piece that fits your bed and your space.
The key is to plan the dimensions and mounting method before making cuts. This beginner-friendly sequence covers design, materials, assembly, finishing, and secure installation, with options for customizing the final look.
Choose a design and measure your bed
Choose a simple headboard design, then measure the bed width, desired headboard height, and available wall space. These dimensions determine the cut list and help prevent a finished headboard from crowding nearby doors, windows, or furniture.
For a first woodworking project, consider a flat plywood panel, a frame made from vertical boards, or a simple horizontal-plank design. A plywood panel is quick to assemble and gives you a smooth surface for paint or fabric. Separate boards add visible grain and texture, but they take more time to align and fasten.
- Measure bed width: Measure the mattress or bed frame, depending on how you plan to mount the headboard. A panel that is close to the bed’s width usually looks balanced; confirm the actual frame dimensions before cutting.
- Set the height: Decide how much headboard should show above the mattress. Account for pillows and the height of the bed, then check the proposed top edge against the wall and any nearby fixtures.
- Check the space: Measure from the floor or bed-frame attachment point to the intended top edge. Consider baseboards, outlets, switches, and wall-mounted lights.
Write down the measurements and sketch the design, including the location of supports and mounting hardware. If you want the headboard wider than the bed, verify that it will not interfere with nightstands or walkways. A wider design can make a room feel more finished, but it needs more wall space and may be harder to move.
Gather tools and materials
For a basic headboard, gather wood, a measuring tape, a saw, a drill and screws, wood glue, and sandpaper. Choose tools that suit your cuts and experience, and buy boards that are straight, dry, and free of major cracks or loose knots.
A sheet of plywood works well for a single-panel headboard, while lumber such as pine is easy to find and usually straightforward to cut and screw together. Plywood saves time on a broad, flat design; individual boards offer a more traditional plank look but require more alignment. Check the store’s available sheet sizes and the planned finished dimensions before buying.
- Measuring and marking: Tape measure, pencil, and a straightedge or carpenter’s square.
- Cutting: A circular saw can make long, straight cuts, while a hand saw can handle shorter cuts with more effort. Ask a lumber retailer whether it can make basic cuts if you do not have a suitable saw.
- Assembly: Drill and driver, screws appropriate for the wood thickness, and wood glue for wood-to-wood joints.
- Prep and finish: Sandpaper in medium and fine grits, plus paint, stain, or a clear sealer.
- Mounting: Bed-frame brackets or wall fasteners selected for the headboard, bed, and wall construction.
Read the instructions for your saw and drill, wear eye protection when cutting or drilling, and keep hands clear of the blade and bit. Clamp the work securely rather than holding a small piece near the cutting line. A simple tool setup is enough; accurate marking and patient assembly matter more than buying specialized equipment.
Plan the cut list and prepare the wood
Make a cut list from your sketch, mark every piece with its finished measurement, and cut only after checking the dimensions twice. Sanding the cut edges before assembly makes the headboard easier to handle and helps the parts fit together cleanly.
For a flat-panel design, the main piece may be a single cut of plywood, with lumber added behind it as supports. For a plank design, list the number and length of boards, plus the dimensions of the top, bottom, or side rails. Allow for the actual width of each board: nominal lumber sizes can differ from their finished dimensions.
- Use a measuring tape and square to mark each cut line. Mark the waste side of the line so you know which side to remove.
- Support the wood on a stable surface. For a circular saw, follow the manufacturer’s instructions and keep the offcut from pinching the blade.
- Cut slowly along the marked line. If using a hand saw, keep the blade aligned and let it do the work rather than forcing it.
- Check the cut pieces against your sketch, then smooth rough edges with sandpaper.
Dry-fit the parts on a flat surface before assembly. If the headboard is made from several boards, arrange them in the preferred grain pattern and check that the total width matches your plan. This is also the time to correct a measurement or replace a badly warped piece, not after glue and screws are in place.
Assemble the headboard
Assemble the headboard on a flat work surface, joining the pieces with wood glue and screws where appropriate. Check that the frame is square before tightening the fasteners, and use supports that prevent a large panel from flexing.
For a plank design, lay the boards side by side and attach them to horizontal support rails on the back. For a plywood panel, fasten support rails or legs behind the panel so the headboard can connect to a bed frame or mounting hardware. Keep supports clear of the planned brackets and any bed-frame fittings.
- Apply a thin, even layer of wood glue to the surfaces that meet. Glue can strengthen a wood-to-wood joint, but it does not replace screws or suitable mounting hardware.
- Drill pilot holes before driving screws, especially near board ends. Pilot holes help reduce splitting and make screws easier to install.
- Fasten the pieces without overtightening. Screws should hold the joint snugly without stripping the wood or pulling the parts out of alignment.
- Measure diagonally from corner to corner in both directions. Similar diagonal measurements indicate that a rectangular frame is square; adjust it before the glue sets if needed.
Wipe away any glue squeeze-out according to the product instructions, then let the assembly cure fully before moving on. The exact screw length and spacing depend on the wood thickness and design, so avoid choosing fasteners that could pass through the front face.
Finish and personalize the wood
Sand the assembled headboard smooth, remove dust, and apply paint, stain, or a clear sealer suited to the wood and the look you want. Let each finish dry for the time listed on its label before handling or mounting the headboard.
Start with medium-grit sandpaper to smooth rough spots, then use a finer grit for the visible surfaces and edges. Sand in the direction of the grain when working with solid wood. Wipe or vacuum away dust so it does not become trapped in paint or sealer.
- Paint: A primer can help paint adhere consistently, especially on plywood or mixed wood surfaces. Use thin coats to reduce drips and let each coat dry as directed.
- Stain: Test the stain on an offcut or hidden area first. Different boards can absorb color unevenly, so a test patch gives you a more reliable preview.
- Clear sealer: A clear protective coating shows the wood grain while adding a finished surface. Follow the label for ventilation, application, and curing guidance.
Simple decorative choices can make a basic build feel personal: add a contrasting top rail, use a two-color paint treatment, or arrange boards in a straightforward pattern. Keep embellishments attached securely and avoid adding heavy items that could pull the headboard away from its mounts.
Mount the headboard securely
Mount the headboard to the bed frame or wall using hardware designed for that specific setup. Check the weight, frame construction, and wall type before installation; no single mounting method suits every bed or room.
Bed-frame brackets are a practical option when the frame has compatible attachment points. Confirm that the brackets align with the headboard supports, then use the fasteners specified for the frame and bracket. The headboard should sit at the intended height without rocking or putting pressure on the mattress.
Wall mounting can work when the bed frame cannot support a headboard or when you want the panel fixed independently. Wall anchors must match the wall material and the load. A fastener made for drywall alone may not be appropriate for a heavy wooden headboard; locate suitable structural support or use an anchor rated for the installation. If you are unsure what is behind the wall, seek advice before drilling.
Before attaching anything, hold the headboard in position and check its height and level. Mark the mounting points, drill carefully, and tighten the hardware according to its instructions. After installation, apply gentle pressure to check for movement. If it shifts, creaks, or pulls away from the wall, stop using it and correct the mounting rather than relying on the finish or a loose screw to hold it.
Frequently asked questions
These quick answers cover common choices for a first headboard build: wood selection, cutting tools, mounting, and height. Use your bed and room measurements to make the final decision.
What wood is easiest to use for a first headboard project?
Plywood is often the easiest choice for a simple, flat headboard because one panel creates a broad surface with fewer joints. Straight pine boards are also beginner-friendly and suit a plank design. Whichever you choose, inspect the material for warping, cracks, and loose knots, and make sure its thickness works with your screws and mounting plan.
Can I build a headboard without a circular saw?
Yes. A hand saw can make shorter cuts, though long, straight cuts take more time and care. You can also ask a lumber retailer to cut sheet goods or boards to your measurements, then complete sanding and assembly at home. Confirm the dimensions of the cut pieces before leaving the store.
Should a headboard attach to the bed frame or the wall?
It depends on the frame, headboard weight, and wall construction. Use bed-frame brackets when the frame provides compatible, sturdy attachment points. Consider wall mounting when the frame cannot support the headboard, but choose anchors or structural fasteners rated for the setup and the wall material.
How do I choose the right headboard height?
Measure from the point where the headboard will attach to the desired top edge, then check the result with the mattress and pillows in place. The right height leaves enough visible wood above the pillows while fitting the wall and avoiding nearby fixtures. A cardboard template taped to the wall can help you preview the scale before cutting wood.
.